
At any rate, my exchange partner stated: "I prefer to receive something on the monster/bad guy side of things... possibly alien even.." and "I would like something a player character would hate to run into on the wrong side of town..." I normally don't do too many critters as I like to stay on the artistic and non-gory sort of minis (I have small children and don't want to freak them out) At any rate, I started looking at the Reaper website and came across this beauty. I thought she looked alien enough, and originally intended to paint her up as some denizen of the forest come to town... or something... The problem is that she is obviously meant for an aquatic environment.
 |
| Slithe Queen in Bare Metal |
 |
| All Primed and Ready! |
At any rate, this project really became an experiment for me, which was kind of a risk. You don't want to send someone a crummy exchange, and we generally use these kinds of projects to push the boundaries of what we can do. Like anything, when you push a boundary, sometimes you break it.
These are some things I experimented with:
1. She is primarily metallic paints stained with inks. I think really the only stuff that's normal paint is her loin cloth, the wood color on the trident, and the spots on her head. Everything else is a blend of Vallejo Gunmetal Grey and Silver metallic paint. There may be a touch or two of Reaper's MSP Pearl White, but not much. The ink colors are mostly Scalecolor 75 Inktensity colors, with a few Liquitex Acrylic Inks thrown in. UNFORTUNATELY, I don't have any pics of this process as this was an exchange, and we normally don't post WIPs (Work In Progress) when we're doing exchanges because we want the project to be a surprise. Let's just say that the process was very much trial and error. My contingency plan if the entire project failed was just to throw a bunch of minis in the box along with the critter along with a cash prize and apology and call it a day... And that almost happened!
2. I bought a Dremel! Once I decided to switch to an ocean theme, I knew that I wanted a seafloor. The easiest way to get that would be to carve into a wooden block. I have carving tools, but had carved on the blocks from Michael's with little effect. At any rate, this became my first Dremel project using carving bits and a flexible shaft attachment. It was fun and messy and would prove itself useful beyond measure by the end of the project.
3. Sentient Sword Eyeball... Kinda looks like a cat's eye or the eye or Sauron. At any rate, I thought it appropriate for a Slithe Queen... whatever that it. I also experimented with color transitions along the blade to give it visual emphasis. I also attempted some freehand on the blade... yeah... need more practice!
4. OSL (sort of) I wanted to give the trident head some sort of power look, so I started some OSL emitting from the large gems. The problem is that with the metallic paint, I couldn't figure out a good way to make it look right reflecting off of her as the paint creates its own reflections/highlights depending on the light source in the surrounding environment. So, I limited this to the area surrounding the gem.
5. RESIN... Oh resin.... When you want a bit of water, you use water effects or that scale-o-rama stuff from Hobby Lobby. When you want an OCEAN, you grab "Amazing Casting Resin" More on this later....
Anyway, here's some pic! First up you can see the wooden block I Dremeled into submission. Also, that's a completed Slithe Queen. You can also see the screw on vise lined with cork sheets to hold the block in place. It made a mess, and yes I used a dust mask and eye protection. It was a ton of fun, and I couldn't help but keep thinking if this bit's doing this to wood, imagine what would happen if it slipped and hit my skin.... Please be careful if you use power tools! (No, no fingers or flesh were harmed in THIS project)
 |
| Wooden Beach |
After carving the beach, I used cork sheets glued together and plucked into shape via needle nose pliers to form a coralish rock thing to serve as decor. Again, not many pics up until I got to the gesso part of priming the scene. I used gesso mainly to seal the cork rock and to provide a white backdrop for the sand that I was going to add to the ocean floor.
 |
| White Beach |
 |
| 3D Beach |
SO, I added sand, paint to the rock, small sea shells from a previous project, round gold glitter for "coins", bits of clear plastic that comes from those cheap "make your own stained glass" kits for kids you get at Walmart, and sand! This is the result.
 |
| "Leave Me Booty Alone!" |


Okay, so far everything was moving along well. I'd had some issues with the inks and metallics as I wasn't sure what I was doing other than playing with metallics and inks, but I'd made it this far so it was time for "THE OCEAN."
I was following an excellent tutorial by Meg Maples. I've never messed with resin before, and figured now was as good of a time as any to learn. So I followed Meg's example to the "T" and ended up with this set-up:
 |
| I must go down to the sea again, to the lonely sea and the sky... |
So, YEA! WATER!! LOOKS GREAT!!! Now, in the tutorial the masking tape worked well. However, hindsight shows that the amount of resin used in the tutorial was no where near the amount used here! I'd left the masking tape somewhat lose as per the tutorial while burnishing it onto the block pretty good. However, when I set the project in my display case to keep it safe from curious children and even more curious felines....
 |
| Look at the lower front corner. Didn't notice this when I took the pic! |
I set it in the cabinet, took the above pic, and didn't notice the tiny drop of resin LEAKING! Of course I noticed this in about 15min. or so when I went back to admire my work. It had made a HUGE mess in my cabinet as it ever so slowly tricked out of the form. Overall, it probably leaked out 20%-25% of the initial resin. Now, keep in mind that as per the tutorial, you fill the form so that the resin level bulges slightly over the top so that when it dries, you end up with "level" water as the resin shrinks slightly while drying. Yeah, that wasn't going to happen here.
SO, I burnished the tape down again, and added rubber bands to hopefully salvage the project! I then did my best to clean up spilled resin... not. easy.
 |
| Rubber Bands are our friends.... |
 |
| My Ocean Runneth Over... |
 |
| What... |
 |
| A.... |
 |
| MESS! |
 |
| Yeah... |
 |
| Winter Wonderland! Santa Slithe! |
This generated a MASSIVE amount of resin, dust, and funk! Thank God I used a dust mask and eye protection! My arms up to my elbows looked like this by the time I got to this stage. I knew I needed to get back down to bare wood on the part that was supposed to be wood and at least attempt to get the sides back down even with the edges. Also, those wicked mold edges HAD to come off. I worked on it for quite a while, broke out additional sand paper to try to restore some clarity back to the resin, and ended up with this:


Whew! There was way more use of the Dremel than I would have liked to have used. I used sandpaper and multiple coats of Clear Sealer to get it back to a "presentable" level. I also believe I used the buffing attachment on the Dremel to help with the process. It didn't end up being as clear as I would have wanted it to be, but it ended up looking pretty good in the end, all things considered!
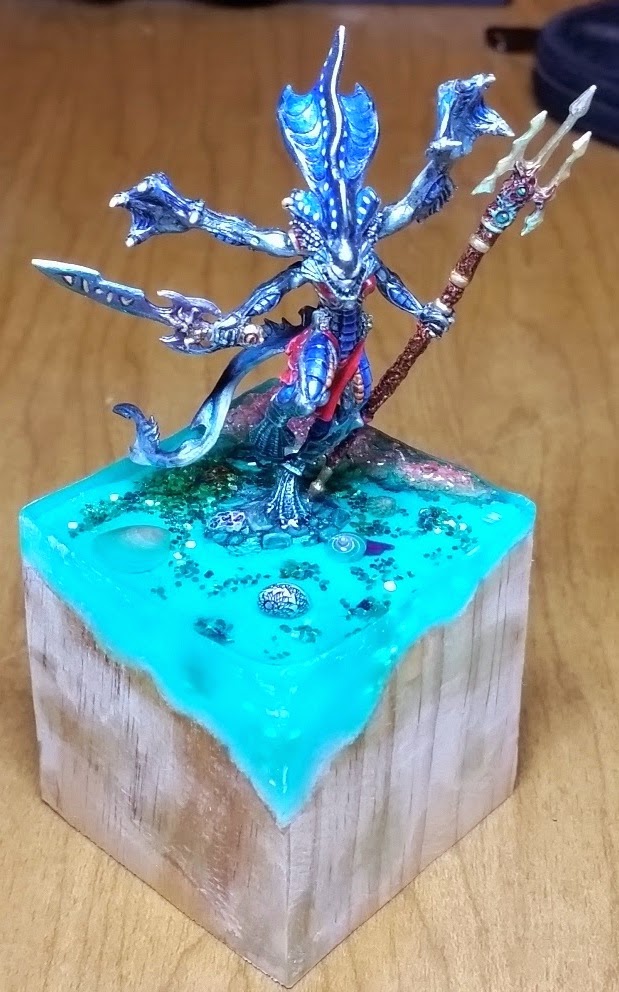
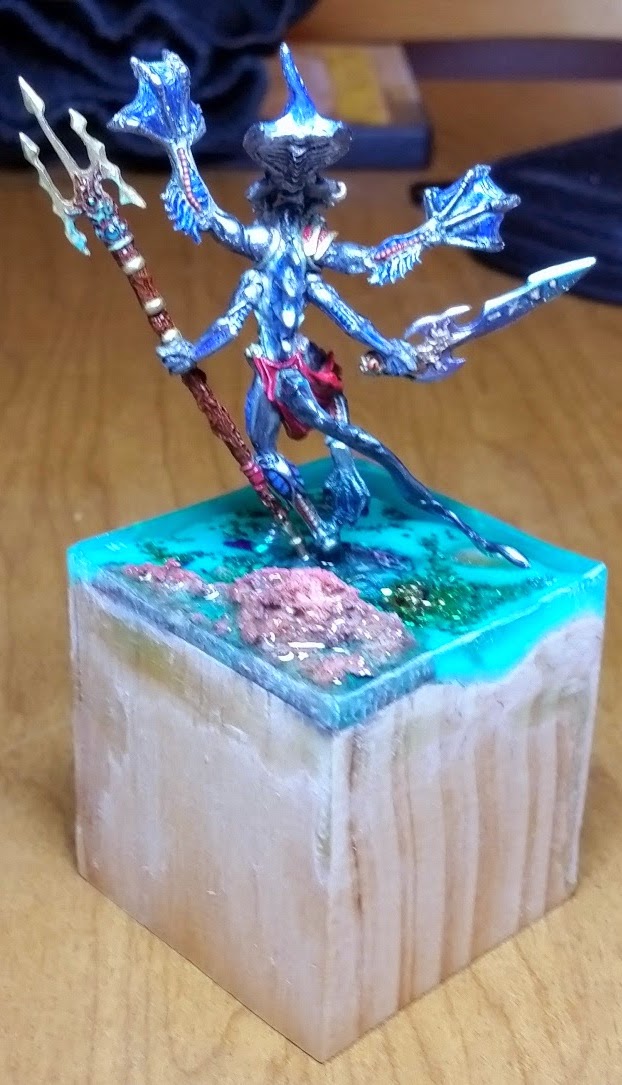
After the resin fiasco, the end was in sight! I ended up painting the base in black and added several different blends of inks to add visual interest to the base. I think these were lost after clear coating the base, but you can probably still see some variations in the colors under the right lights.


By this stage, I still hadn't come up with a name for the project. I decided to name it "Low Tide" and the finished result is below. Hope you enjoyed this basic WIP! I've got a few more projects in the works that I may post up here as well. All questions and comments are welcome!


No comments:
Post a Comment