Monday, January 19, 2015

1st Place Year of the Giants in Diorama Category!!!

Hello all!
I haven't gotten a lot of time to paint lately as I've been fighting off a nasty chest cold! However, I do have exciting news as I was able to place 1st in the Year of the Giants contest over on the Reaper forum in the diorama division. I call this piece: "Mothers" Here's the write-up I did for it:


Mothers

The Beast of the North has teeth that are unseen, yet cut to the bone. She has eyes that never sleep, ever seeking to slip your soul from its mooring into eternal slumber. She has claws that rip babes from their mother’s arms, fathers from the arms of their brides, and tear through the fragile bonds that bind the elderly to this plane. The North is a harsh mistress, and the creatures that survive there has been shaped by her cruel nature.

Such was the fate of Kendric, Elder Tribesman of Eagle’s Eyrie, husband of Kaya, father of Bran and Hrothgar, beloved of many. In the year of the two moons, his life was stamped out by one of these cruel creations of the Beast: Nidhogg the Vile, Wyrm of the North.

It was the night when Nidhogg came,

Seeking souls and meat to fill her venter.

The dark mistress hungered for innocent flesh,

Young and pure to quench her bloodthirst.

Though large, crafty she was,

Sliding silently though the frost-kissed glade.

Through town and tent she glided,

Until old Nidhogg found young Hrothgar’s bed.

The blood of kings this night she needed,

And that of the young and pure.

Two chomps and a swallow were all it took

To silence young Hrothgar’s cry.

In wide-eyed silence stood young Bran,

His turn next to die.

But lo! In came brave Kendric,

Blazing axe held high.

Chomp, chomp went the Wyrm’s fierce maw,

Rage blazing in Nidhogg’s eye.

Kendric knew the time was short,

His last young son to save.

The Vile lunged, the two she desired to claim,

Brave Kendric met the charge head on,

The Wyrm’s head he sought to mame.

As time and tale doth quite repeat,

Young Bran he managed to save.

But lo! Great Kendric the dawn did not greet,

By Nidhogg the Vile he was slain.

Great fire from her form did flare,

Igniting wood, and flesh, and bone.

Fear, and tears, and blood did flow,

Revenge did Kaya vow.

The Wyrm herself a mother now,

In matronly care does rest.

Kaya the Ravager plots in fury,

To slay the Wyrm or die.


The cost to the village was great. Nidhogg the Vile, Wyrm of the North visited many that night, causing pain and destruction wherever she went. Many lives were lost, and the very existence of the tribe was in peril. Widowed and with no one to care for young Bran, Kaya the Ravager, baby Bran in tow, set forth into the wilderness. She has vowed to either take the head of Nidhogg and bring life to the village, or end the dynasty with her death and that of young Bran.

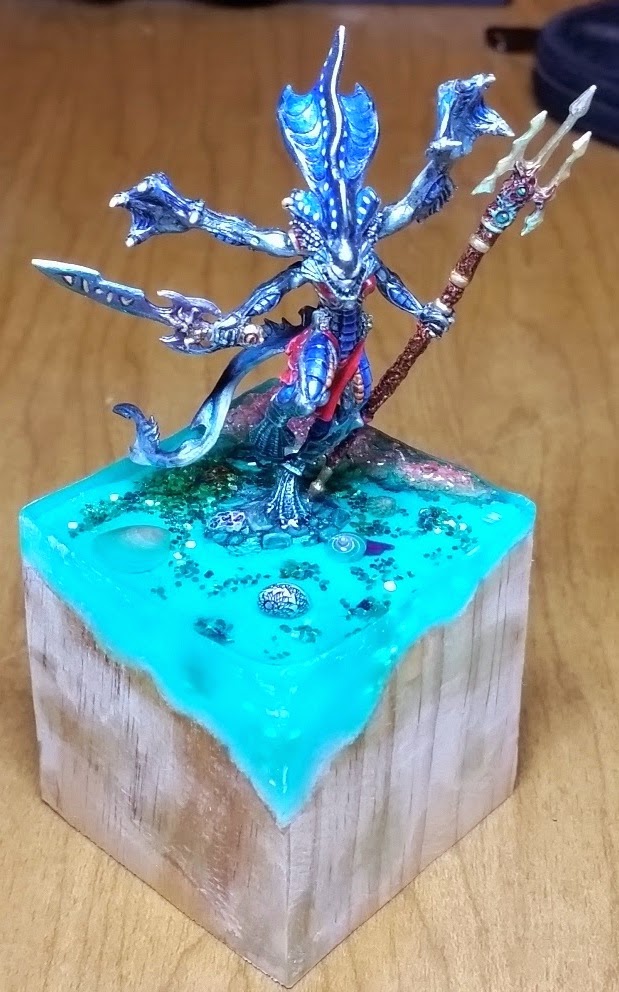
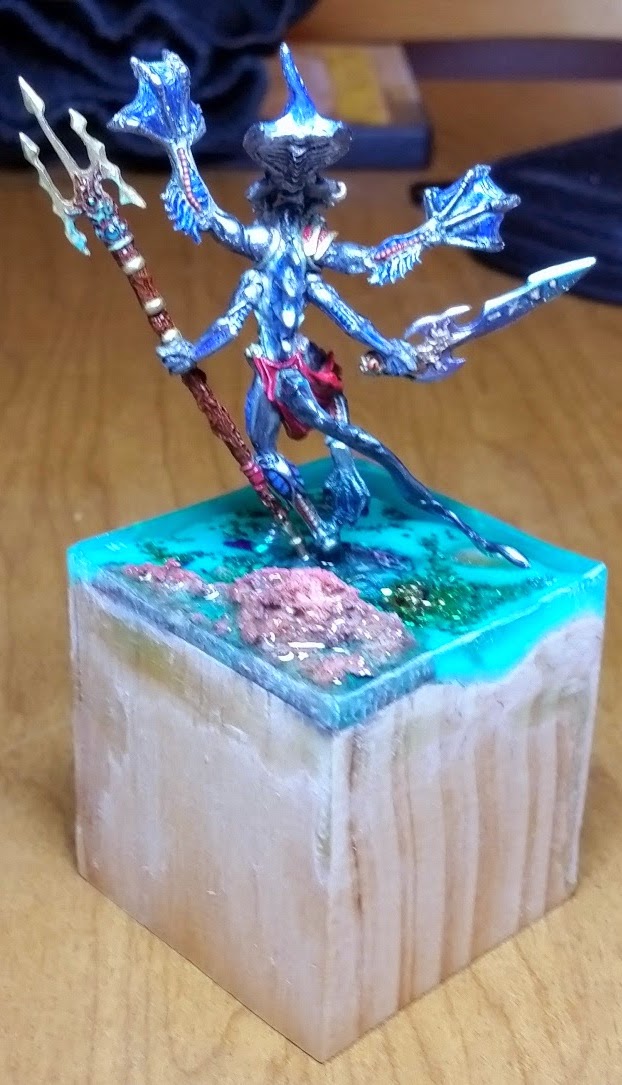
Here's a General Pic:


Here's the collage of the piece:


Friday, January 2, 2015

Where Have You Been!?

Okay! It's been a while since I've posted, but I've got a few treats in store for you guys. We've just launched into 2015, and that's a good thing! December of 2014 was a very, very busy month for yours truly. However, it's now January, and I intend to cut back a bit and catch up on a few things, this blog included. 

The last time I posted, I put up my little Hasslefree Bulldog, intended for the contest over on the WAMP forum. Sadly, he did not place! Of course, not all was lost as there were some very good submissions over on the forum, and those are always nice to look at. Kudos to the winners!

So here's what I worked on in December:

"Hello! I'm the Doctor!" I worked vigorously on a Dr. Who diorama for my nephew for Christmas. Now let it be known that I have seen very little of Dr. Who, and I couldn't have completed this diorama without help from the good people on the Reaper forum. This diorama was a rush job that I started on a Saturday afternoon and finished up by Tuesday midday. Every night was a late one, but I needed to do a great job on the piece, and overall, I believe I accomplished that. 

Pretty much all of this piece was custom made, save for the miniatures themselves. The 10th Doctor is actually Dr. Hugh II from Heresy Miniatures, and Rose is actually Daisy Taylor from Crooked Dice Miniatures. Everything else was custom built by myself. The WIP of this project is over on the Reaper site, if you're curious. It's not super detailed as I was flying through this project to get it done in time. The fun thing is that the light on top and the internal lights flash when the piece is turned on via a switch in the bottom. My nephew has the make the WOOOSHH!! WOOOSHH!! sounds himself.

Somewhere In Time And Space....
 

Hello Doctor!
The Companion

Doctor Close Up
Rose Close Up
I did some detail on Rose's back as per web references.
At any rate, my nephew loved his Christmas present. I'm scheduled to get another Doctor in who was on back order. I may build another diorama and possibly either keep it or put it up for sale somewhere. My curio cabinet is filling up fast, so I'm going to have to find something to do with all of these pieces! 

Secondly, I finally finished my Year of the Giants diorama entry for the Reaper Forum. They haven't been judged yet, but I am very happy with the way it came out. You may remember Kaya the Reaper from an earlier post, and this diorama was her final destination. Again, most of this was scratch built. The tree is made of wire and milliput. The cliff is carved out of cork. The bundling around the baby is made of green stuff, which I am growing fond of. You can read more about this piece on the forum post here. Normally I copy backstory and post it here, but this blog is already too long...


At any rate, it's been a very busy time for yours truly. I hope to post more now that I have these major projects behind. If you have any questions or ideas for upcoming blogs, feel free to contact me or leave a post below. Thank you so much for reading!

-K

Sunday, November 23, 2014

Target Acquired (and entered into contest!)

Evening all! As promised I've finished up the Hasslefree Contest entry over at the WAMP site. I'm going to go ahead and post the collage I had to create for the forum. More detailed pics can be found over at the Reaper Forum. He is based on a 2" block I picked up from Michael's, featuring a cast Hurst arch, Jaweela bricks (yes, they're individually stacked and glued), potting soil, burned edges, nail art flowers (!?), and a label made from brass sheet. Smudgester himself is removable from the base, being mounted on a 1.25" wooden checker, so he can be used in various games and such. Here's his "story:"

K963025 was never designed to function without a master. However, the Old Smudgester was separated from "the man" during the great battle of New D.C. Now, armed with his Lazegun 4000 and his improved power armor, this highly intelligent being roams about the country righting wrongs, blasting "bad men" and searching for his loving master. Will Smudgester ever find "the man?" Undoubtedly!


He was a lot of fun to paint and base! I hope you all enjoy this piece.

-K

Friday, November 21, 2014

Teaser Pics!


Hello all! I haven't forgotten about you. I've just been really busy trying to complete all of the work for the Hasslefree contest over on WAMP and to prep for the Year of the Giants contest over on the Reaper site. It's been a lot of fun, and I even managed to get a small project together for my awesome wife. This little lady is Reaper's Bailey Silverbell, who's been haunting the drawer 'o shame for quite some time. She's suiting for gaming, well, at least for our purposes on a 1.25" checker. Overall I think I spent about a week on her from start to finish.


Anyway, just figured I'd put something up as I haven't blogged in a bit. I do not have a WIP for Bailey Silverbell, as she was just something I decided to do. 

The Hasslefree contest diorama is almost finished! It took a drastic change from "Hasslefighter" to something completely different. I should finish it up in a few hours and then it's picture time. Here's a teaser shot...


Thanks for reading!

-K


Friday, November 7, 2014

"How To Make A Mess" or Reaper Fall Exchange 2014

Dear Reader! It's been too long since I've blogged, but I have a very good reason for this. For a while I've been working on a major project for Reaper's Fall Miniature Exchange. If you're not familiar with this event, you need to get over to the Reaper forum and get involved in the community! It happens several times per year, and essentially goes like this: you paint up a miniature and ship it to an exchange partner, and someone else paints a mini and ships it to you. It's kind of like a pyramid scheme without the pyramid, and an awesome payoff that everyone benefits from you.

At any rate, my exchange partner stated: "I prefer to receive something on the monster/bad guy side of things... possibly alien even.." and "I would like something a player character would hate to run into on the wrong side of town..." I normally don't do too many critters as I like to stay on the artistic and non-gory sort of minis (I have small children and don't want to freak them out) At any rate, I started looking at the Reaper website and came across this beauty. I thought she looked alien enough, and originally intended to paint her up as some denizen of the forest come to town... or something... The problem is that she is obviously meant for an aquatic environment.

Slithe Queen in Bare Metal
All Primed and Ready!


At any rate, this project really became an experiment for me, which was kind of a risk. You don't want to send someone a crummy exchange, and we generally use these kinds of projects to push the boundaries of what we can do. Like anything, when you push a boundary, sometimes you break it.

These are some things I experimented with:

1. She is primarily metallic paints stained with inks. I think really the only stuff that's normal paint is her loin cloth, the wood color on the trident, and the spots on her head. Everything else is a blend of Vallejo Gunmetal Grey and Silver metallic paint. There may be a touch or two of Reaper's MSP Pearl White, but not much. The ink colors are mostly Scalecolor 75 Inktensity colors, with a few Liquitex Acrylic Inks thrown in. UNFORTUNATELY, I don't have any pics of this process as this was an exchange, and we normally don't post WIPs (Work In Progress) when we're doing exchanges because we want the project to be a surprise. Let's just say that the process was very much trial and error. My contingency plan if the entire project failed was just to throw a bunch of minis in the box along with the critter along with a cash prize and apology and call it a day... And that almost happened!

2. I bought a Dremel! Once I decided to switch to an ocean theme, I knew that I wanted a seafloor. The easiest way to get that would be to carve into a wooden block. I have carving tools, but had carved on the blocks from Michael's with little effect. At any rate, this became my first Dremel project using carving bits and a flexible shaft attachment. It was fun and messy and would prove itself useful beyond measure by the end of the project.

3. Sentient Sword Eyeball... Kinda looks like a cat's eye or the eye or Sauron. At any rate, I thought it appropriate for a Slithe Queen... whatever that it. I also experimented with color transitions along the blade to give it visual emphasis. I also attempted some freehand on the blade... yeah... need more practice!

4. OSL (sort of) I wanted to give the trident head some sort of power look, so I started some OSL emitting from the large gems. The problem is that with the metallic paint, I couldn't figure out a good way to make it look right reflecting off of her as the paint creates its own reflections/highlights depending on the light source in the surrounding environment. So, I limited this to the area surrounding the gem.

5. RESIN... Oh resin.... When you want a bit of water, you use water effects or that scale-o-rama stuff from Hobby Lobby. When you want an OCEAN, you grab "Amazing Casting Resin" More on this later....

Anyway, here's some pic! First up you can see the wooden block I Dremeled into submission. Also, that's a completed Slithe Queen. You can also see the screw on vise lined with cork sheets to hold the block in place. It made a mess, and yes I used a dust mask and eye protection. It was a ton of fun, and I couldn't help but keep thinking if this bit's doing this to wood, imagine what would happen if it slipped and hit my skin.... Please be careful if you use power tools! (No, no fingers or flesh were harmed in THIS project)

Wooden Beach

After carving the beach, I used cork sheets glued together and plucked into shape via needle nose pliers to form a coralish rock thing to serve as decor. Again, not many pics up until I got to the gesso part of priming the scene. I used gesso mainly to seal the cork rock and to provide a white backdrop for the sand that I was going to add to the ocean floor. 


White Beach

3D Beach

SO, I added sand, paint to the rock, small sea shells from a previous project, round gold glitter for "coins", bits of clear plastic that comes from those cheap "make your own stained glass" kits for kids you get at Walmart, and sand! This is the result.


"Leave Me Booty Alone!"


Okay, so far everything was moving along well. I'd had some issues with the inks and metallics as I wasn't sure what I was doing other than playing with metallics and inks, but I'd made it this far so it was time for "THE OCEAN."

I was following an excellent tutorial by Meg Maples. I've never messed with resin before, and figured now was as good of a time as any to learn. So I followed Meg's example to the "T" and ended up with this set-up:

I must go down to the sea again, to the lonely sea and the sky...

So, YEA! WATER!! LOOKS GREAT!!! Now, in the tutorial the masking tape worked well. However, hindsight shows that the amount of resin used in the tutorial was no where near the amount used here! I'd left the masking tape somewhat lose as per the tutorial while burnishing it onto the block pretty good. However, when I set the project in my display case to keep it safe from curious children and even more curious felines....


Look at the lower front corner. Didn't notice this when I took the pic!

I set it in the cabinet, took the above pic, and didn't notice the tiny drop of resin LEAKING! Of course I noticed this in about 15min. or so when I went back to admire my work. It had made a HUGE mess in my cabinet as it ever so slowly tricked out of the form. Overall, it probably leaked out 20%-25% of the initial resin. Now, keep in mind that as per the tutorial, you fill the form so that the resin level bulges slightly over the top so that when it dries, you end up with "level" water as the resin shrinks slightly while drying. Yeah, that wasn't going to happen here.

SO, I burnished the tape down again, and added rubber bands to hopefully salvage the project! I then did my best to clean up spilled resin... not. easy.


Rubber Bands are our friends....
 I knew this was going to be a huge mess, but had to allow the resin to set for at least 24 hours. I believe I left it for 36 hours or so, then removed the rubber bands and tape to find what you see below....


My Ocean Runneth Over...

What... 

A....

MESS!

Yeah...
The thing with resin is that it can be challenging to get it acceptably clear. Now, water isn't necessarily crystal clear, but I'd based the project with the idea that my water (first attempt) would at least be presentably clear. At this point, there was no other choice but to attempt to salvage the project. I'd already put in quite a few hours of work and spent money on upgrades to complete this project, so I just made do with what I had... and broke out the Dremel and sanding drums... 


Winter Wonderland! Santa Slithe!

This generated a MASSIVE amount of resin, dust, and funk! Thank God I used a dust mask and eye protection! My arms up to my elbows looked like this by the time I got to this stage. I knew I needed to get back down to bare wood on the part that was supposed to be wood and at least attempt to get the sides back down even with the edges. Also, those wicked mold edges HAD to come off. I worked on it for quite a while, broke out additional sand paper to try to restore some clarity back to the resin, and ended up with this: 


Whew! There was way more use of the Dremel than I would have liked to have used. I used sandpaper and multiple coats of Clear Sealer to get it back to a "presentable" level. I also believe I used the buffing attachment on the Dremel to help with the process. It didn't end up being as clear as I would have wanted it to be, but it ended up looking pretty good in the end, all things considered!

After the resin fiasco, the end was in sight! I ended up painting the base in black and added several different blends of inks to add visual interest to the base. I think these were lost after clear coating the base, but you can probably still see some variations in the colors under the right lights. 


By this stage, I still hadn't come up with a name for the project. I decided to name it "Low Tide" and the finished result is below. Hope you enjoyed this basic WIP! I've got a few more projects in the works that I may post up here as well. All questions and comments are welcome!